Outdoor Blinds Measuring Guide
Measuring for your Outdoor Blinds couldn't be easier. It won't take long; just follow these simple instructions. The sizes you supply are the overall blind size, and we work everything out to fit within this space; the roller and all components will fit inside the dimensions you give us.
What You Will Need
- Tape Measure or a Laser Measuring Tool if you have one.
- A Pen to note your sizes.
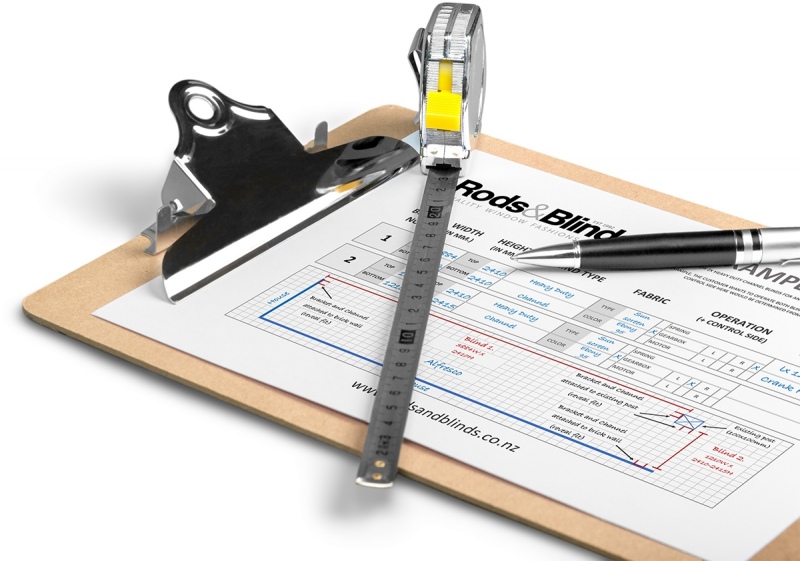
- A copy of our Measuring Sheet.
Face, Reveal or Ceiling Mount?
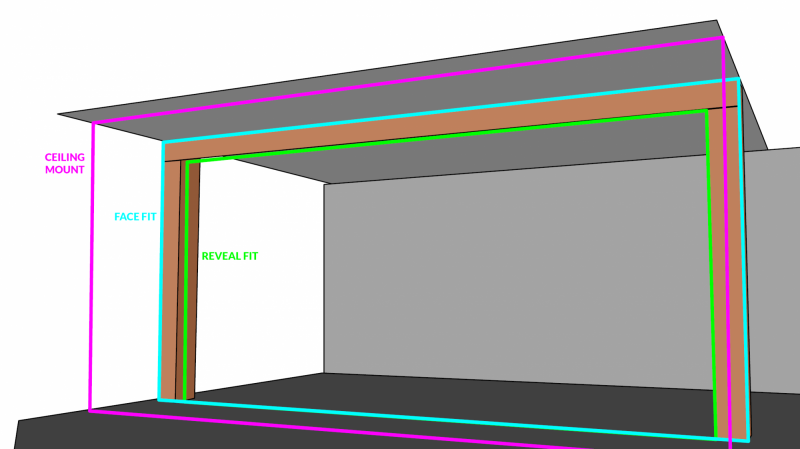
There are three ways to install Outdoor Blinds:
Reveal Fit: inside a recess or between posts.
Face Fit: on the face of a beam, post or wall.
Ceiling Mount: to the underside of ceiling or beam.
Reveal Fit (Inside Opening)
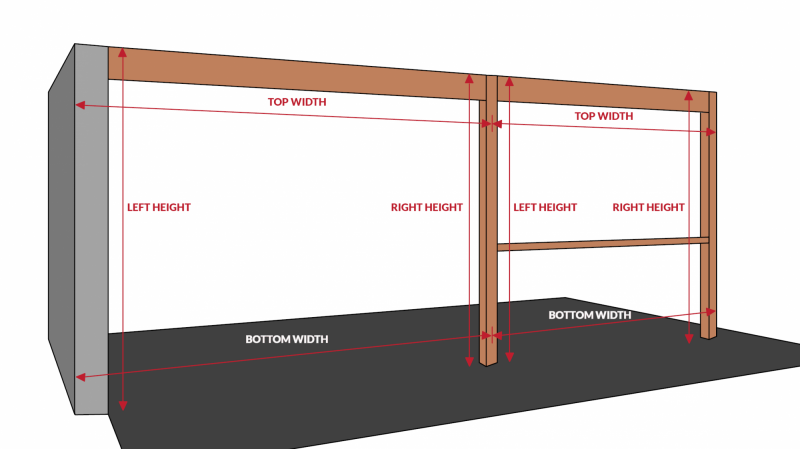
A Reveal Fit is perfect for areas with posts or walls on both sides with a clear span in between.
Width
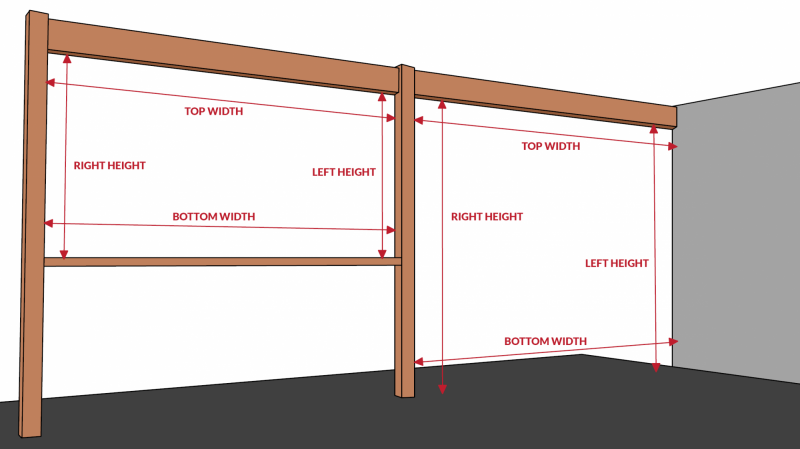
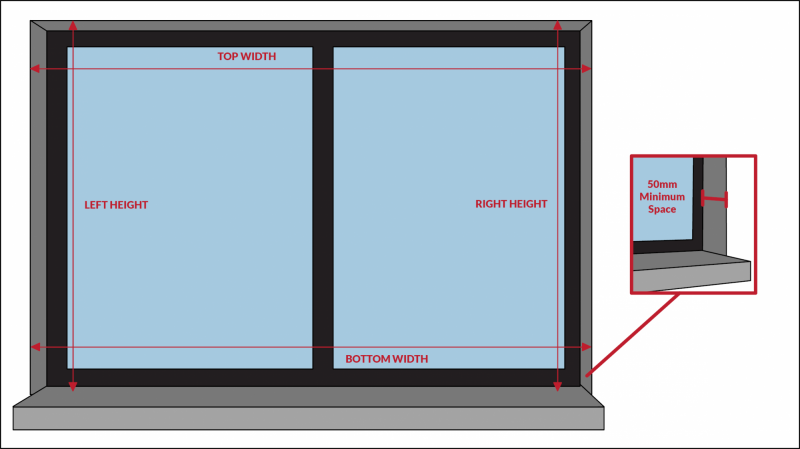
- Measure from one side of the opening to the other at the top note this measurement.
- Measure from one side of the opening to the other at the bottom note this measurement.
- Use the smallest size for your order.
Note: If the difference between these widths is greater than 10mm, then some packing or levelling will be required to ensure a snug fit for your blinds.
Height
- Measure from the top left side of the opening to the point you want your blind to stop note this measurement.
- Measure from the top right side of the opening to the point you want your blind to stop note this measurement.
- Use the longest size for your order.
Note: It is normal to have some variation in the height, usually to allow water to run away from the house.
Face Fit (Overlap Opening)
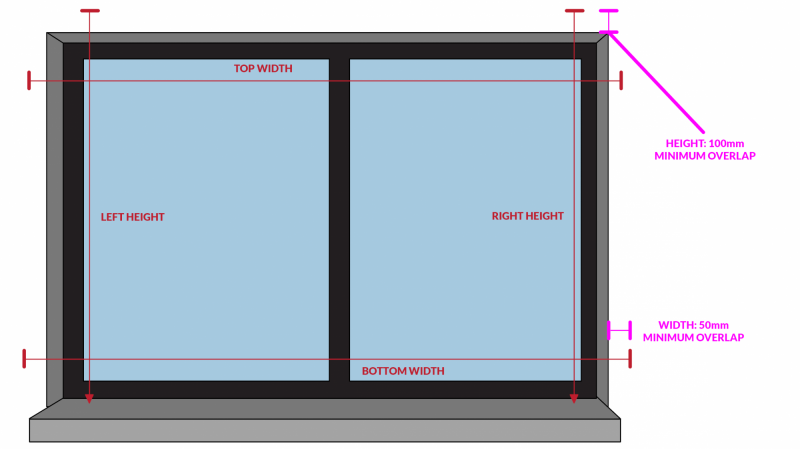
A Face Fit is ideal for hiding installation hardware and the edges of fabric or side channels; this is also suited to areas with a handrail obstructing the clear span between posts.
Width
- Measure from one side of the opening to the other at the top note this measurement.
- Measure from one side of the opening to the other at the bottom note this measurement.
- Add 100mm (50mm on each side) to these measurements to allow for sufficient overlap for installation.
- Use the smallest measurement as the actual width.
Note: Its a good idea to overlap the opening by more than 100mm (50mm on each side) if you have enough room to minimise light gaps and hide installation hardware from the inside, but its all subject to how much space you have available for installation.
Height
- Measure from the highest point on the face of your beam on the left side of the opening to the point you want your blind to stop note this measurement.
- Measure from the highest point on the face of your beam on the right side of the opening to the point you want your blind to stop note this measurement.
- Use the longest measurement for your order.
Note: A minimum of 100mm is required to install the brackets. It is normal to have some variation in the height, usually to allow water to run away from the house.
Ceiling Mount (Under Fit)
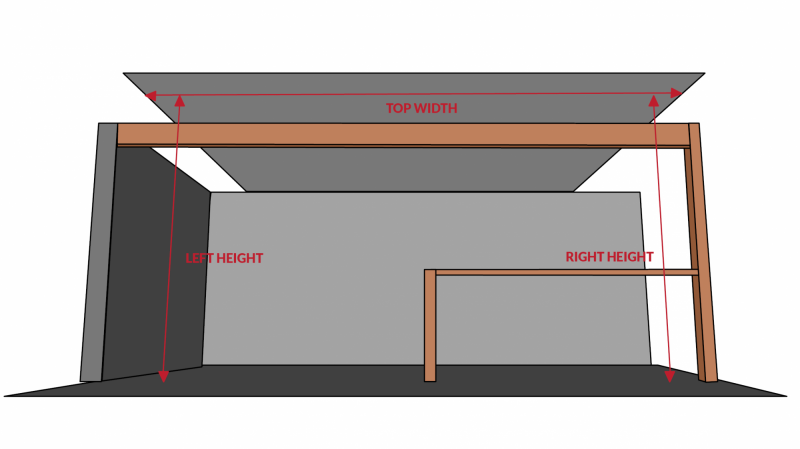
A Ceiling Mount is used to mount your blind to the underside of a top beam or ceiling; This is ideal when there are no side posts or walls to attach the mounting brackets.
Width
- Make a couple of small marks on your beam or ceiling to the width you want your blind.
- Measure in between these two marks note this measurement.
- Use this measurement for your order.
Height
- Measure from the underside where you made your marks on the left side to the point you want your blind to stop note this measurement.
- Measure from the underside, where you made your marks on the right side to the point you want your blind to stop note this measurement.
- Use the longest size for your order.
Note: It is normal to have some variation in the height, usually to allow water to run away from the house.
Some Handy Hints
- For greater accuracy, use either a laser or metal carpenters tape measure.
- Take your measurements in millimetres (mm) to the nearest mm, to ensure a perfect fit.
- When measuring, always look for objects like air conditioners or downpipes etc. and take their position into account, if necessary, to ensure you have a clear span.
- If youre still not sure, please send us a picture of your area to [email protected], and we can illustrate the best way to measure.
Important Note:
We custom make all our outdoor blinds to your exact specifications, so please take extra care when measuring. We will not be held responsible for incorrect measurements provided to us; its always a good idea to double-check all sizes when measuring.


